The Essential Video
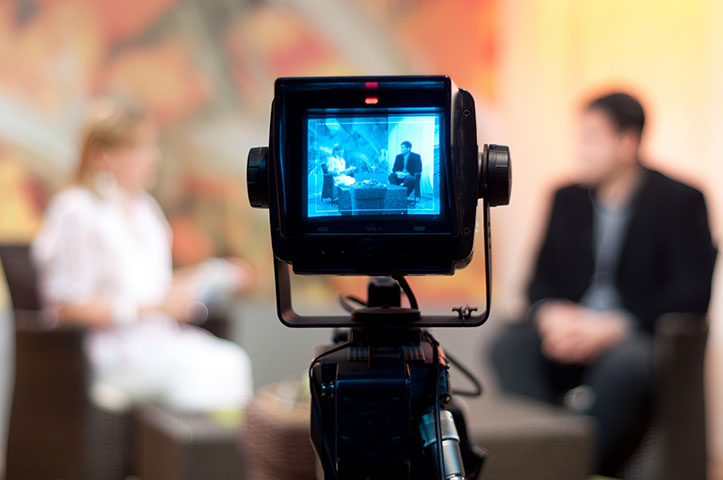
The video is an essential contributing factor towards the success of any Crowdfunding campaign. It is known that Crowdfunding campaigns are more effective with a video message incorporated. Almost all Crowdfunding campaigns today make use of captivating video messages to convey the message about their cause to potential backers. Rarely will you come across a campaign that does not use a video message.
According to Indiegogo, Crowdfunding campaigns that use videos have an increased success rate. A captivating campaign video may exponentially increase the success of any given campaign by up to 60%. Video increases sales volumes by up to 20%.
Videos offer the unique opportunity for you to be personable and to tell your story. They allow you to directly appeal to Backers in a way that text and pictures will not. This is a chance to showcase whatever values backers will be pleased with – professionalism, communication skills, sense of humour and innovation.
For product-based campaigns, a video becomes the avenue backers will use to interact with your product. Present the product prototype and explain the different features and demonstrate the benefits. Backers will want to know how your products work to solve their problem. Use the video to achieve this.
What is captured in your video plays a major role in determining the success of your campaign. In order to make your message understandable and the video effective, keep in simple, focus on the key things, and remember your audience only has a minute or so to follow along and you may have been working on the project for months or years.
There are really 2 main ways to go about making your product video. Hire a production company, or a professional to run the show. There are companies that will take care of everything from helping your define the brand to filming and editing. There are packages from $5,000-$10,000.
The advantage with this approach is that you can focus on the hundreds of other things you need to do and let them do what they do as professionals with all the professional equipment. The quality of the final video will be high. If you are aiming for a high goal over $100,000 then this is the way to go.
On the other hand if you are working to budget then the do it yourself option is certainly viable. There are tons of very successful Crowdfunding campaigns the have very low budget videos.
Check out a few Crowdfunding videos of successful campaigns a get some ideas. A very successful strategy is to work to the same plan as a video that you like and will fit your campaign. We say it is working from the shoulders of giants. In any case as you progress the video will change and morph as your progress, as you go.
You think that just freewheeling in front of the camera will work out and look natural but usually ends up looking like what it is, essentially unprepared. If the video looks unprepared then your potential backers will likely think the product development is too.
I’ve reviewed some guys that look like they just got off the coach and through the video together between jugs of beer and you think they look really cool and so natural. Well behind the scenes is a completely different picture these same guys have worked some serious effort and time into looking really cool and easy. The old saying “I have to work really damn hard to make it look so easy” is true today as ever.
It all starts with a plan and the plan starts with the story. A great story usually goes like this. A person lives in a world they want to change, they see the problems and want to fix them but can’t. They one day they meet someone a mentor who gives them a gift, the gift enables them to be all they can be they embark on a journey and defeat the worlds evils and return with a gift they share with the world that make the world a great place and they are the hero.
Pretty simple, well yes and you have make the video tell the same sort of story, when you present your product. But, the hero isn’t you no the hero is your audience your potential backer, you are the mentor and the gift is the product you are offering. With that gift they will be able to solve problems and live in a better world.
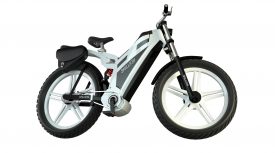
For example if you are offering a bike with electric motor, then the problems might be the traffic on the way to work, and bike will allow them to commute on bike hence being able to be a little fitter, more relaxed at work and better person and a hero for reducing traffic and saving the environment. Pretty cool huh?
Now you present that story with the video showing the guy commuting and then on his bike etc etc.
Now you want to wrap that story up, a simple plan for that might be to mix the video message, the story with the details. Some filmmakers use storyboarding to develop a detailed map of how the video will play out.
You could try this sort of a plan
- Start on a personal note, introduce yourself, and briefly introduce your team.
- Give a quick summary, and establish the main features of your project. At this point backers will quickly grasp the major content and look forward to detailed information.
- Tell your story. A powerful story makes a successful campaign. Tell the backers watching your video what your project is about and why they need to back your cause.
- Let the bulk of your video communicate the key features of your product, unique aspects about it, its advantages and what benefits your product offers. Make viewers and backers understand how your product can help solve a particular problem.
- End with a clear call to action, ask your viewers to act. Here you can tell the viewers what stage of production your project is in and what challenge you face. Inform them that their help will help a lot in finalizing the project and bringing it to the market. Finally, close by thanking the viewers for taking time to watch your video.
The video’s duration – 1 – 3 minutes is ideal but some have run to 11 minutes or so it depends really how much there is to show and if you can keep people interested. Try to keep in shorter rather than longer as it leaves as sense that the product will be packed with great value and also engenders some expectation.
If you choose to produce the video by yourself, uncomfortable about being on camera, there is a ton of tools to make really great tools, such as screen capture, that you can port directly to video. Even slide presentation and images to tell the story easily and quickly. Add some music, again there is free and low cost options for making great content with images, video and royalty free music try Shutterstick.com but there are loads of others.
I recommend you get in front of the camera if you can. It creates that deeper connection with your potential backers, it puts a face to the product and people are social creatures, we respond to other people, we buy based on our emotions.
If you decide to get in front of the camera, here are some basic tools you will need.
- An iPhone or Camcorder, an iPhone has a great camera and works really well, even is you don’t use it for the final shoot I recommend practising as much as you can with it.
- A camera stand, or video logging stick, this will mean you don’t need to have someone holding the camera; you might like to try the Bluetooth button controls, to make it even easier.
- A lapel microphone or hand held microphone, this is really essential, poor audio is something that viewers will reject, so invest hear. A directional microphone can work well too, and is good at reducing echo and background noise, as well as being very conveniently and there are some available for iPhones. If you want the best audio quality then you can’t really go past the lapel microphones, and if you need convenience try a wireless kit.
- Storage media with sufficient space. An iPhone5 video uses about 3MB per second of video so a few hours and you’ll be through you 32GB card.
- Video editing software, most computers already have this, Apple has iMovie and Windows Movie Maker for PC, there are loads of free video and image editing software products which you can download and trial or have a limited (but useful) tool set, enough to get you started.
A few tips that you might find useful if you are looking to do the video yourself
- Tip 1. Get lots of practice in front of the camera
- Tip 2-99. See Tip 1
- Tip 100 – 120 All the other stuff
I think I’ve stressed that enough, and stress is the issue, most people new to presenting tense up and it feels and looks awkward. The trouble with looking awkward is that the audience focus on you looking awkward and can totally miss your message. Practising is cheap, just delete and try again. A few more tips…
Tip 101. The B-Roll
B-roll is footage that reveals things in the situation, details, or generally enhances the story. For example, the product in the workshop or garage where the guys are working, faces of the team, or tools used to the build the product
They are great for covering cuts, or smooth transitions from one scene to another.
Tip 102. The Jump cut
A jump cut when editing out footage and the presenter (the subject) has moved with the exact same camera set up background. IT can jar your audience and would be acceptable for a professional production. However a lot of video loggers do this and it has become acceptable practice and most people are used to it. However there are ways to hide it cover the cut with some b-roll, or use a fade.
Tip 103. The 180 Degree Rule
Imagine a horizontal line between you and your subject known as the “axis of action”. When shooting, keep the camera on one side of this line. This will keep perspective that is more natural for the audience. If you have to disobey this rule, try using a b-roll between cuts. The perspective won’t be as abrupt, if it’s noticeable at all.
Tip104. The 45 Degree rule
If you are taking multiple angle shots from various angles, say of your subject or the product. Use shots that are looking at the subject from at least a difference of 45 degrees. The angles are too similar then they can appear like a jump cut
Tip 105. Cut on Motion
The human eye is easily distracted by motion and this can hide editing cuts if you want to cut from one image to another. For example as you open the box revealing your product for the first time and cut away as the lid is removed and show the face of the expectant opener.
Tip 106. Changing Focal Lengths
If you have a long interview or monologue, you can change focal lengths. A wide shot and a close up makes the video more interesting and can hide any jump cuts.
Tip 107. Cut on Similar Elements
In Apocalypse Now (the movie) the camera cuts from a rotating ceiling fan to a helicopter. The dramatic change in scenes makes for a smooth but dramatic effect. You can cut from the rotating wheel on the pushbike to the rotating wheels in the factory or drill press.
Tip 108. Wipe
A wipe is when the frame fills with one element, say a persons shirt as they walk in front of the camera. It makes it easy to cut to a completely different scene without jarring the audience. You can create wipes during shooting, or just take advantage when they happen.
Tip 109. Scene matching
If someone is holding a product on one scene, then they should be seen to be still holding it in the next. Video editing means footage can be taken out of order and time, but this means things might not match up.
If this occurs you can cover it up with a b-roll.
Tip 110. Motivate to cut away
Ideally every cut should be motivated or have a reason to switch. Sometimes you have to cut to cover up something. But if the best case your motivations for cutting should be to advance the narrative storytelling of your video.
Wrap up the video with a good first still, the image that potential backers see before they click the video is an important aspect of the video. It is the first contact your visitors will make with the video before it plays. The image used should lure visitors into clicking the link to play your video.
Show the video to a couple of friends who are not aware of your project yet and see if they can make out every aspect of the video without any further explaining and illustration. Edit the scenes and parts that seem unclear and test the final release before publishing the video alongside your campaign.
The video is the backbone of your Crowdfunding campaign. Releasing a poor video for your Crowdfunding campaign may undermine the project. On the other hand some of the most successful campaigns have created very simple video, of the Creator at their desk talking about the product and being very successful.
You don’t need a production team be yourself, be prepared, plan and be sincere and the video will do the rest. It has been said that difference between a good video presentation and bad one is the number of out-takes – get lots of practice in front of the camera and get comfortable. Oh and enjoy yourself!
Author Details
Other projects by this user


Leave a Reply
You must be logged in to post a comment.


Share This